I've reloaded handgun rounds by the thousands, but, I'm new to rifle. I bought my loader last June, but have yet to load a round.
I've researched a lot on this site (which is outstanding, by the way), but now I suffer from information overload. There are things I just wish I didn't know. I feel like I'm becomming a slave to the case prep process.
Here's the dilemma: All I want to do is hit a prairie dog at a quarter mile, most of the time. I'm not going to be on the Olympic shooting team. I'm not going to be a mile long sniper for the CIA. So, I want to reload to a reasonable, not ultimate, criteria.
With that in mind, do you guys think this sounds reasonable:
- I have only Hornady brass, all once fired in my only Savage 204 FV12
- clean all, no lube (titanium nitride sizer)
- trim all to 1.84", chamfer, debur
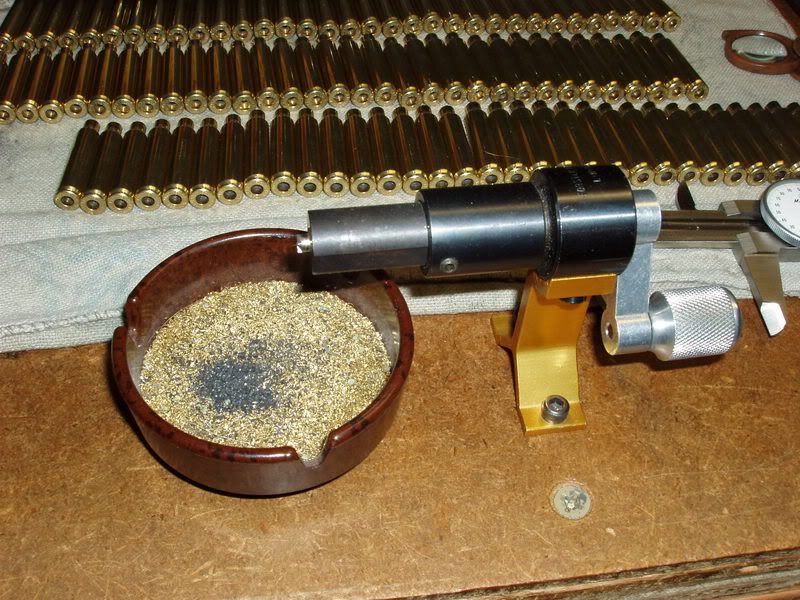
- neck size with a Redding bushing neck sizer, .225
- use Federal 205 match primers
- load with Benchmark (weight to be determined)
- top with Berger 35, or, Sierra BK 32, or BK 39 (to be determined)
- seat with Redding Match seater (with micrometer top)
- adjust seat depth using Stoney Point OAL guage to keep ogive a few thousanths from the lands. (noting that this is much longer COL than factory ammo)
- spot check for bullet run out
Therefor, I'm planning on skipping:
- full length size (all brass once fired in my one rifle)
- primer pocket work
- flash hole deburr
- neck turning
I want to stop researching and start turning out some loaded rounds. This is good enough, isn't it??
Thanks
case prep & reloading for the average dog
-
gunsaregood
- New Member
- Posts: 16
- Joined: Sat Jun 10, 2006 8:08 am
case prep & reloading for the average dog
Firearms ownership is a right
Firearms safety is a responsibility
Learn today and teach others
There is no safety in ignorance
Firearms safety is a responsibility
Learn today and teach others
There is no safety in ignorance
-
Hawkeye Joe
- Senior Member
- Posts: 737
- Joined: Tue Aug 08, 2006 4:42 pm
- Location: Pendleton,New York


-
race4hills
- Junior Member
- Posts: 81
- Joined: Tue Jun 13, 2006 8:05 pm
- Location: Denver , CO
I think you could get by with that. You can allways add steps later if you don't the results you want. I started for my first 204 about like that and got good groups. I do think the primer pocket and flash hole are really worth the time to get right, and tools are not costly. Right now I am not planing on doing any neck turning for my guns. I don't think fur knows if they are turn or not. 
204 try it you'll like it!
-
Rick in Oregon

- Moderator
- Posts: 5187
- Joined: Thu Dec 01, 2005 4:20 pm
- .204 Ruger Guns: Sako 75V, Cooper MTV, Kimber 84M, Cust M700 11 Twist
- Location: High Desert of Central Oregon
- Contact:
guns: You have done your homework well my friend. Only a couple of notes:
You are going to have very good accuracy with the criteria you've set forth, but if you do only two more steps, your quarter mile PD quest will have not been in vein.
1. You DO want to uniform your primer pockets; failure to do so will only give you inconsistant ignition. Believe me, if I didn't feel it was necessary to that 1/4 mile accuracy you want, I certainly would not do it.
2. You also DO want to deburr those flash holes. Just imagine that primer flame from those nice match primers being deflected at every odd angle imaginable from those nasty little burrs inside the case that have been punched instead of drilled like Lapua and Norma cases. The primer flame must be uniform from shot to shot inside the powder column. Unless you want to really cut corners, 1/4 mile hits on a dinky prairie dog will not be realized unless you bite the bullet and get this step done.
Sure, you will make the occasional hit on some unsuspecting dog out there, but you'll smile more from more consistant hits at long range if you take care of the ignition sequence described above. The entire process is wasted if you try to cut this important step. The whole thing starts with ignition.
With all the work you plan to do anyway, two more steps will have been well worth the effort. As an aside, I'm also active in pistol reloading, and the steps necessary for top rifle accuracy are not needed in pistol reloading....it's an entirely different set of rules.
Neck turning is not necessary in factory barrels, you can skip that one.
Semper Fortis
Rick in Oregon
NRA Life/OHA/VHA/VVA
Oregon, East of the Cascades - Where Common Sense Still Prevails

Rick in Oregon
NRA Life/OHA/VHA/VVA
Oregon, East of the Cascades - Where Common Sense Still Prevails
-
skipper
- Moderator
- Posts: 1618
- Joined: Thu Feb 09, 2006 3:32 am
- .204 Ruger Guns: Remington XR 100, Custom build Lilja/Panda/Shehane/Jewell
- Location: Cypress, TX
Awe, come on Rick. You know neck turning is one of my favorite case preparation procedures.
gunsaregood
Be careful, once bitten by the accuracy bug and you will be weighing every case, every bullet, sorting by run out, annealing every case and in general, become like the rest of us. Smitten with the Obsessive Compulsive disorder.
In preparation for the arrival of my custom rifle I have started case preparation on my Norma brass. I can't believe that I am preparing Norma brass but it's true. I already have them full length sized and am in the process of turning them all to .011 since this will be a tight necked chamber. I just bought a Hart shell holder that will fit into my drill so I can neck turn without the hassles of using the Forster case holder with the yellow screw that eats into my fingers every time I tighten it. I just can't wait to get my hands on a rifle with the potential of shooting in the one's consistently.
It sounds like you have a good grasp of what is required for those long range shots. Enjoy your time at the bench. To me, it is one of the most satisfying aspects of shooting. I love the look on peoples faces when I show up at the range and get out my personal front rest and rear bag. Then I set up my personal spotting scope and pull out my plastic box full of that ultra shiny, match grade ammo. They really take notice when all the rounds fall into the one inch bulls eye and stack up to make one hole. The confidence it inspires when you actually get into the field is priceless.
 Hold 'em & Squeeze 'em
-
huntsman22
- Senior Member
- Posts: 463
- Joined: Tue Nov 07, 2006 7:56 pm
- .204 Ruger Guns: ruger 77VT and ruger mkII Ultralite
- Location: Deer Trail, CO
guns, You may need a full length resize die, eventually, to bump shoulders back if the brass grows enuff to have hard chambering. Neck turning gives a consistent tension, even with bushing dies. It all pays off if you want the most accurate round you can make. I agree on not skipping the primer pockets and debur.Don
-
Rick in Oregon
- Moderator
- Posts: 5187
- Joined: Thu Dec 01, 2005 4:20 pm
- .204 Ruger Guns: Sako 75V, Cooper MTV, Kimber 84M, Cust M700 11 Twist
- Location: High Desert of Central Oregon
- Contact:
Ha Skip! I knew you'd bite on that one.
Really, neck turning for a factory barrel does have one advantage: all your brass will have no high spots in the necks, they will all be identical, and identical brass is what makes one hole groups. You only want to remove the high spots though, no more brass removal than, say about 30%. Too much will not give you enough neck tension to properly hold the bullet without resorting to tight neck bushings. (Skip knows all this...)
In regard to guns comments about skipping these two important steps, it made me think about prior to doing so years ago, I was having trouble wondering why some primers in brand new brass would not seat just below flush with the case head. Some would be flush, or slightly below (recommended), and some would be up to .005" high. What was going on I asked.
All brass from the same lot is not created equal. Factory punches wear, some are fresher than others, and all brass in a bag lot of 100 pieces may have come from up to five different punch presses. Also, the bottom of the pockets are rarely square and perfectly flat on the bottom. This will be evident when you ream the pocket; every single brand new case will have been cut to some degree.....none of them are the proper depth, and none of them will be flat/square on the bottom, no matter which maker you are working with. Once you start reaming those primer pockets, you'll see every single primer right at .005" below flush with the case head.....the proper setting in the case for consistant ignition.
Bottom line: If you want good, consistent tight groups, you must do these two steps, or your rifle's accuracy potential will never be fully realized.
Semper Fortis
Rick in Oregon
NRA Life/OHA/VHA/VVA
Oregon, East of the Cascades - Where Common Sense Still Prevails
Rick in Oregon
NRA Life/OHA/VHA/VVA
Oregon, East of the Cascades - Where Common Sense Still Prevails
-
contender hunter
- Junior Member
- Posts: 88
- Joined: Sun May 01, 2005 6:49 am
- .204 Ruger Guns: Thompson Contender 23'' Bull BBL. Custom laminate Stock
- Location: Northeast Pa.
I can really second the recommendation on primer pocket work- inside and out , it works !!!
What I was getting without it was alot of groups with 2 touching and then a flyer maybe off a inch or so .
Like I said before it was all Ricks doing!!! And while I am writing this it reminds me that I have had this happen so many times before with other calibers AND THIS MIGHT HAVE BEEN THE TROUBLE ALL ALONG AS I NEVER DID ANY POCKET WORK!!!
One other thing , the pocket uniformer isn't wasted for a one time use as it makes a good pocket cleaner tool for future loadings and also cuts a little brass as the case grows after more shooting.
-
Keith in Ga

- Senior Member
- Posts: 279
- Joined: Wed Oct 18, 2006 7:39 pm
- Location: north Ga
One thing I ran into with the Hornady brass......When I adjusted the die to full length size my brass (die touching the shell holder). It sized my Winchester brass, but when I ran Hornady brass thru the die....the brass won't chamber in the rifle. I since bought a Stoney Point guage to check the length to the shoulder. I'm going to have to "bump" the Hornady brass some more to get it to chamber. You ought to try some of your sized brass and see if it will chamber. The chamber on my Cooper may be "tight" and you may not have to do it to your gun....but it wouldn't hurt to check.
-
gunsaregood
- New Member
- Posts: 16
- Joined: Sat Jun 10, 2006 8:08 am
Well, you talked me into doing primer pocket and flash hole work. I was just looking at saving a little time in prep, and gaining some time on the shooting line.
I would assume that the flash hole is a one time thing. Is the primer pocket something I need to do more than once?
Thanks again for all this learning -- and at a tuition I can afford.
I would assume that the flash hole is a one time thing. Is the primer pocket something I need to do more than once?
Thanks again for all this learning -- and at a tuition I can afford.
Firearms ownership is a right
Firearms safety is a responsibility
Learn today and teach others
There is no safety in ignorance
Firearms safety is a responsibility
Learn today and teach others
There is no safety in ignorance
-
race4hills
- Junior Member
- Posts: 81
- Joined: Tue Jun 13, 2006 8:05 pm
- Location: Denver , CO
-
Rick in Oregon
- Moderator
- Posts: 5187
- Joined: Thu Dec 01, 2005 4:20 pm
- .204 Ruger Guns: Sako 75V, Cooper MTV, Kimber 84M, Cust M700 11 Twist
- Location: High Desert of Central Oregon
- Contact:
Bench-mounted Forester unit with carbide cutters for me.
Last edited by Rick in Oregon on Mon Jan 22, 2007 6:27 pm, edited 1 time in total.
Semper Fortis
Rick in Oregon
NRA Life/OHA/VHA/VVA
Oregon, East of the Cascades - Where Common Sense Still Prevails
Rick in Oregon
NRA Life/OHA/VHA/VVA
Oregon, East of the Cascades - Where Common Sense Still Prevails